How I stopped procrastinating and wrote my first lead-author paper
Created: 2/4/2026, 6:15:02 AM · Updated: 2/5/2026, 3:12:28 AM
Writing a first lead-author research paper is one of the most intimidating milestones in a PhD student’s career. Even with strong results and positive feedback, self-doubt and fear of criticism can make it hard to get started. In this article, one of our editors reflects on their own experience of moving from procrastination to publication during their PhD. They share practical strategies that helped them make progress, including starting with figures, building the results section first, and tackling the more conceptual writing later. The article offers both guidance and reassurance for early-career researchers navigating the challenges of scientific writing.
Writing your first research paper can be intimidating. For many early-career researchers, the challenge is not generating results, but knowing how to turn those results into a publishable manuscript.
In this article, I share my process of paper writing in the hope that it may help early-career researchers and PhD students who may be struggling in the same way I once did.
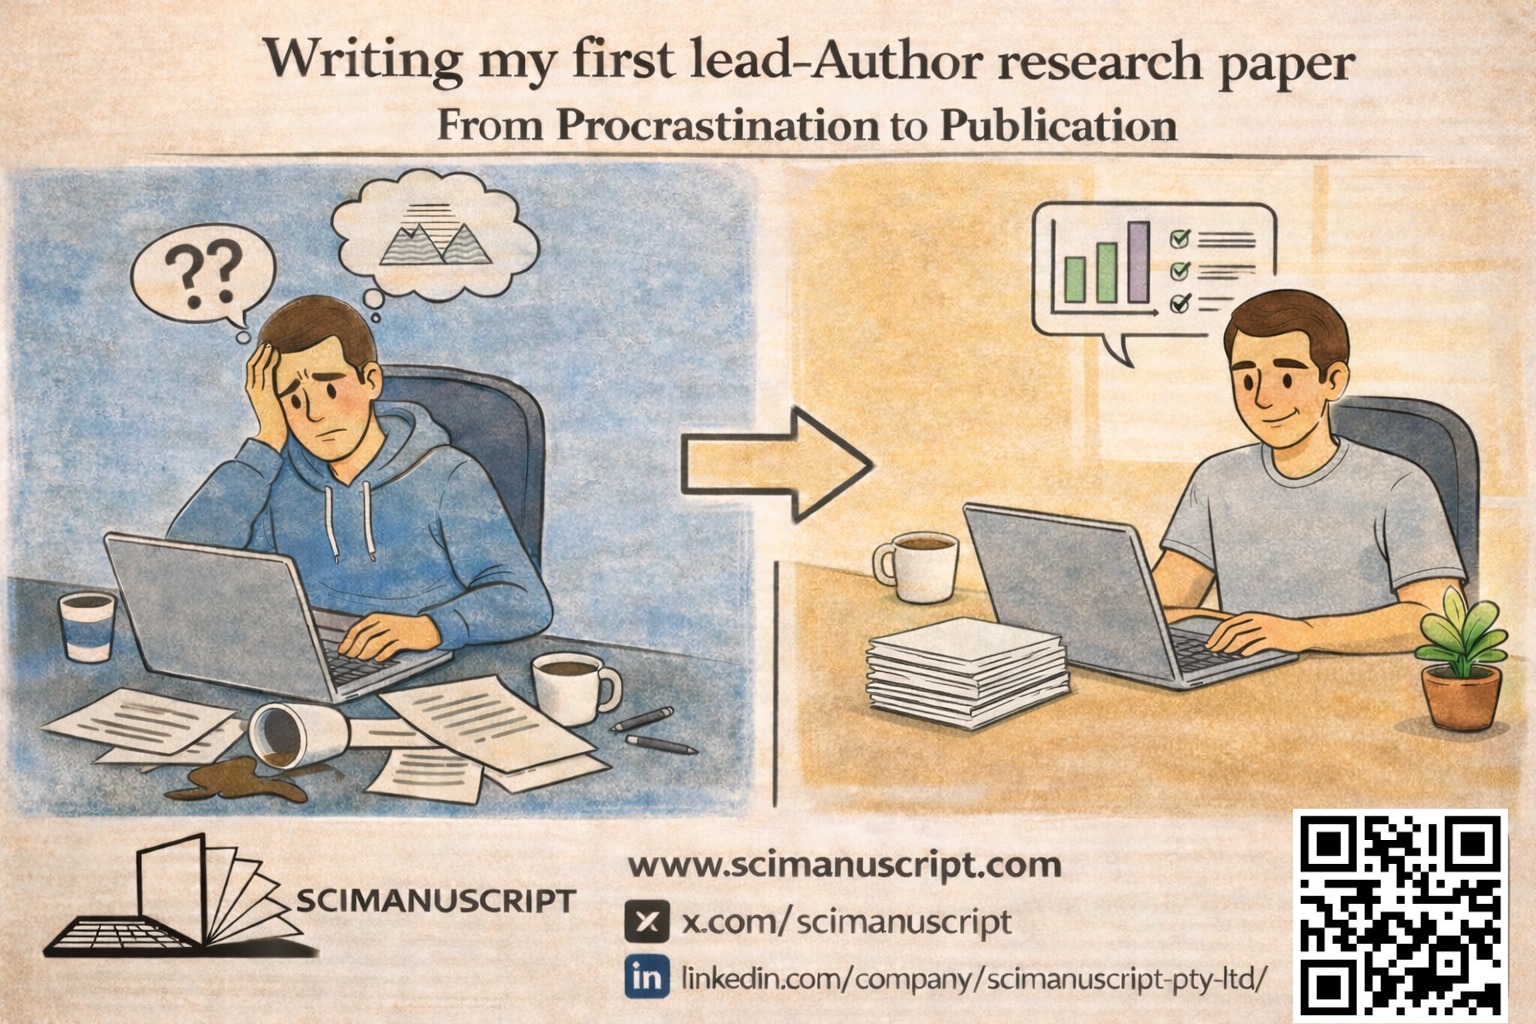
I had stalled for weeks before writing a single sentence during my PhD, despite having results that were publishable. I had already presented my work at seminars and conferences and received encouraging feedback, yet turning those results into a manuscript felt unexpectedly hard.
1. The procrastination phase
At first, I kept telling myself I would start soon. I felt nervous! What if the paper wasn’t good enough? What if direct competitors picked it apart? These thoughts led to serious procrastination. But procrastination turned out to be even more stressful than writing.
It took a long meeting with my PhD advisors to finally get going. They didn’t ask me to start with the introduction or a polished first draft. Instead, they nudged me to begin with something concrete: the figures (I already had a version that was included in my poster presentations).
2. Getting started: Figures first and then Results
This was the turning point. Having already produced publication-quality figures for earlier collaborative papers, I decided to start there. I was trained to use large, readable fonts (9–10 pt at the final published figure size). I used thick axes and ticks and ensured that symbols, error bars, and labels were clearly visible at 300–600dpi resolution, without the need to zoom. I used consistent colours to represent the same conditions across all figures, along with uniform fonts, line thickness, and symbol styles throughout the paper. For guidance on creating clear, publication-ready figures, see Nature’s guide to figure presentation.
I then wrote the figure legends, ensuring that each could stand on its own without readers needing to refer back to the main text. Next, I used figures to build the results section. This was mechanical but straightforward: I first briefly introduced the rationale for each specific experiment, followed by the results. This text explained the figures, group comparisons, statistical tests, and p-values. My advisors also asked me to add a summary statement pointing out the message at the end of each result paragraph. Slowly, the paper began to take shape.
3. Writing the discussion: articulating your contribution to the field
Once the results section began to take shape, I faced the next challenge: framing these findings within the broader scientific story. By incorporating studies that had informed my experiments, the introduction became clearer. The task then was to present the background, highlight the knowledge gap, and demonstrate how my work addresses it.
The discussion section is where many people struggle. I know this from my experience as an editor working on research manuscripts. If you have ever written your discussion as a combination of a literature review and retelling of the results section (perhaps in the first draft of your first paper), you aren’t alone. My PhD advisors insisted that you often need to experiment with different angles/structures to ensure that your story is well told. I made connections and some form of the bigger picture gradually emerged.
Once I had a complete draft, my advisors stepped in with suggestions that were eye-opening. They reworded paragraphs to improve flow and introduced precise language (concise, strong terms that say a lot with few words). After about 8–9 rounds of feedback (with my advisors and a colleague who helped with data analysis), we had a full draft. This was exhausting.
4. Save the abstract for the last
The abstract came last. I find it amusing that the section at the top of a paper was the last one to be written. But this is a common practice. Writing it last ensures you have a clear view of the full story, something you really get once rest of the paper is in place. I like this resource from the University of Wisconsin-Madison as it provide practical tips and sample abstracts.
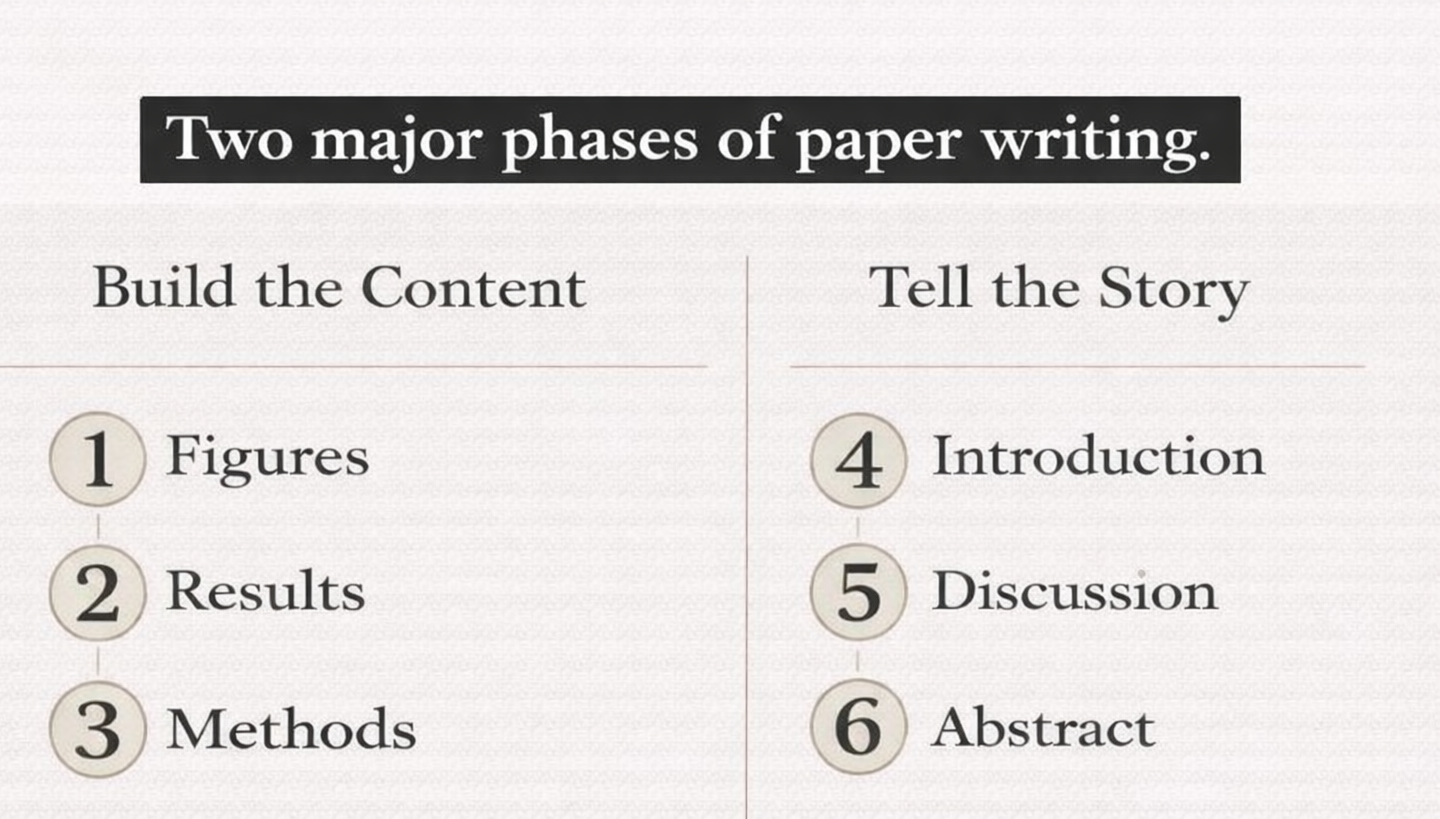
5. Two major stages of paper writing
Looking back on the process, I realized that once I stopped procrastinating, the paper was written in two distinct stages. This distinction turned out to be the most important lesson I took from the process. The first stage was the easier, more concrete part. I focused on preparing figures, writing figure legends, and building the results and methods sections. This stage felt manageable because it was closely tied to the data and analyses I already knew well. Each completed figure gave me a sense of progress and momentum.
The second stage was more challenging. It involved working on the introduction, discussion, and finally the abstract. Here, the task shifted from showing results to explaining their significance, placing the work in context, articulating its contribution, and telling a coherent story. Understanding that writing has a concrete phase and a conceptual (storytelling) phase changed how I approach every paper since.
Once the draft was finalized, submitting was the next step (more details on this topic in the next blog post). It came with its own challenges but I learned how to navigate the submission process.
6. A few generic but helpful practical tips
- Start with figures and legends to overcome blank-page anxiety.
- Create an outline for each section (Introduction, Methods, Results, Discussion) using bullet points or headings.
- Know the difference between the Introduction and Discussion sections: the introduction sets the stage using existing literature, while the discussion builds on it using findings from the current study.
- Write the abstract last, once the full story is clear.
- Include only the key data in your first submission. Reviewers often ask for more, so keep some data in reserve.
- Use reference management software (Zotero, EndNote, Mendeley etc.) to save time and reduce formatting errors.
- Get feedback before submission: advisors, colleagues, or professional scientific editors help refine your narrative and tone.
7. Final thoughts
In short, my procrastination was not about laziness. Instead, it was about the challenge of turning my results into a story and fear of judgement from others. By breaking the work into concrete steps, starting with figures, and then tackling the conceptual sections, I finally made progress. If you find yourself stuck, remember that writing a paper is a learnable process, and each small step brings you closer to publication.
SciManuscript publishes practical notes on manuscript clarity, peer review, revision after submission, handling rejection, rebuttal letters, and other useful resources for early-career researchers and ESL authors, with some content also relevant for established researchers. Stay tuned!
About the author: Anupratap Tomar is the head of the Neuroscience Editing team at SciManuscript.
Connect with SciManuscript: X: https://x.com/scimanuscript
LinkedIn: https://www.linkedin.com/company/scimanuscript-pty-ltd